10 Simple Steps to a Perfectly Planted Tree or Shrub
Plant your tree right with these ten easy steps.
Planting a tree is an exciting endeavor, but it's crucial to ensure proper planting techniques to promote the health and longevity of your tree. By following these 10 simple steps, you can give your tree the best start in life. From selecting the right species to providing the necessary care, each step plays a vital role in fostering a healthy and thriving tree.
Step 1: Right tree, right place!
Before embarking on your planting journey, it's essential to choose the right tree species for the designated spot. Opting for native trees offers numerous benefits, such as drought resistance, positive ecological impact, and increased resistance to pests and diseases. Native trees have adapted to the local environment, making them more likely to thrive.
Step 2: Find and expose the root collar
Many nursery trees have their root collars buried beneath the soil. To locate the root collar, start digging into the soil at the top of the root ball or container. You'll typically find a larger structural root, which is the same width as one of the main branches. Expose the root collar by digging everything in the container down to that level.
Step 3: Measure and dig the hole
Measure the root ball of your tree. The hole should be three times wider than the root ball and the exact depth from the root collar to the bottom of the root ball or pot. This ensures that the root collar will not be buried, as a buried root collar can lead to rot and ultimately harm the tree. Remember to contact 811 to locate any underground utility lines before digging.
Step 4: Remove burlap sack or bucket
Carefully remove the tree from its container or burlap sack. If the tree is wrapped in burlap, cut and remove any twine or string holding the burlap together. Ensure that the tree's roots are free from any constraints before placing it in the hole.
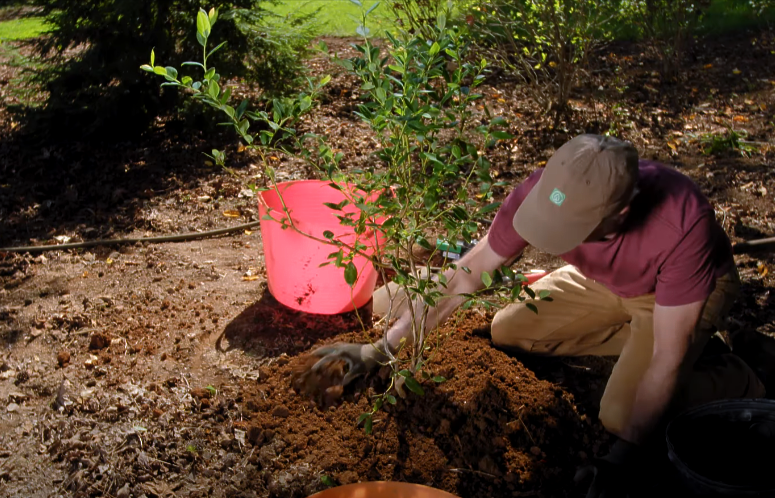
Step 5: Carefully place the tree in the hole
Gently place the tree in the hole, ensuring that the root collar is level with or slightly above the surrounding ground. To accurately determine this, get down on the ground and position your head near the edge of the hole. Checking the root flare's positioning is vital, as a proper root collar alignment promotes healthy growth.
Step 6: Backfill with soil and compost
After positioning the tree correctly, pack some soil around the bottom third of the root ball to stabilize the tree. Next, backfill the hole using a mixture of soil and high-quality compost, avoiding the use of fertilizers. Break apart any large clumps to ensure proper distribution of the soil mixture.
Step 7: Gently compress soil and add a final layer of compost
Use your foot to gently compress the backfill soil around the base of the tree. Be cautious not to over-compact the soil, as it should have ample pore space for new roots to grow easily. Once the soil is compressed, spread a final layer of compost on top of the backfill.
Step 8: Add wood chips
Apply a generous layer of wood chips around the base of the tree, extending to the edges of the hole. Wood chips offer several benefits, including root protection, moisture retention, and the gradual release of nutrients into the soil. Spread the wood chips evenly, taking care not to pile them against the tree trunk.
Step 9: Don't bury the root collar!
Double-check that the root collar remains exposed after adding the wood chips. A buried root collar can lead to excessive moisture retention and subsequent rot, which can be detrimental to the tree's health. Ensure that the root flare is visible and not covered by soil or wood chips.
Step 10: Water your newly planted tree
Watering is critical during the initial stages of tree growth. For the first two years, regularly check the moisture level by pulling back the mulch around the base of the tree, grabbing some soil, and squeezing it. If water can be squeezed out, the tree is adequately watered. However, if the soil is dry and dusty, it's time to water the tree again. Consistent watering will help establish a strong root system.
By following these 10 simple steps, you can ensure a perfectly planted tree or shrub that will flourish for years to come. From selecting the appropriate species to providing proper care and attention, each step contributes to the overall health and vitality of your tree. Remember that the first year, the tree sleeps, the second year it creeps, and by the third year, it leaps into vibrant growth. Enjoy the journey of planting and nurturing your tree, and if you need any further guidance or have questions, feel free to
seek assistance from experts in the field. Happy planting!
You might also like
Kanata Tree Blog